15 Affordable Outdoor Fire Pit Design Ideas on a Budget
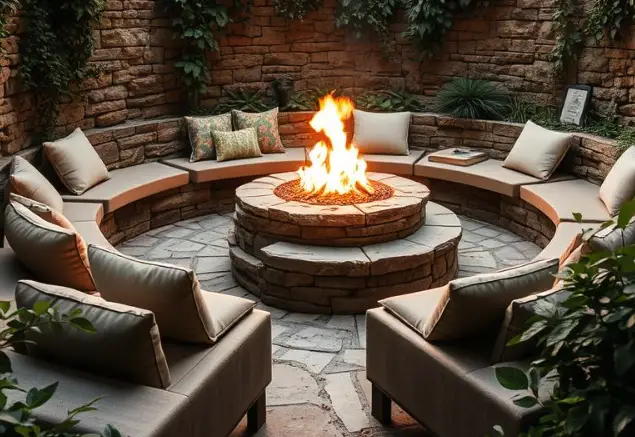
Did you know that gathering around a fire pit can increase your quality time with family and friends, creating lifelong memories? Creating a cozy ambiance in your backyard doesn’t have to be expensive.
You can achieve a warm and inviting atmosphere with a few simple touches, like comfortable seating, soft lighting, and personal decor that reflects your style.

You are about to explore 15 affordable design ideas that won’t break the bank. Whether you’re looking to host gatherings or simply enjoy a quiet evening under the stars, we’ve got you covered with various budget-friendly designs that you can DIY or purchase pre-made.
Creating Backyard Ambiance Without Breaking the Bank
You can create a warm and inviting backyard ambiance on a budget by incorporating a fire pit into your outdoor living space.
A well-designed fire pit area not only adds warmth and light to your backyard but also becomes a focal point for social gatherings.

Why Fire Pits Enhance Outdoor Living Spaces
Fire pits significantly enhance outdoor living spaces by providing a cozy gathering spot for family and friends. The warmth and light from a fire pit create a welcoming atmosphere, making your backyard feel more inviting.
Moreover, a fire pit extends the outdoor living season, allowing you to enjoy your backyard even on cooler evenings.
The ambiance created by a fire pit also encourages social interaction and relaxation. Whether you’re roasting marshmallows, sharing stories, or simply enjoying the warmth, a fire pit becomes the heart of your outdoor entertainment area.
Budget-Friendly Approach to Outdoor Entertainment
Adopting a budget-friendly approach to outdoor entertainment involves creativity and resourcefulness.
When it comes to fire pits, there are numerous affordable options, from DIY projects using recycled materials to budget-friendly store-bought models.
To keep costs low, consider repurposing materials you already have or sourcing inexpensive alternatives. For example, using stones or bricks you have on hand can significantly reduce the cost of building a fire pit.
Additionally, shopping during sales or using coupons can help you stay within your budget.
01. DIY Concrete Block Outdoor Fire Pit
You can easily enhance your backyard ambiance with a budget-friendly DIY fire pit made from concrete blocks.
This project is perfect for those looking to create a cozy outdoor space without breaking the bank.
Materials Needed and Cost Breakdown
To build your DIY concrete block fire pit, you’ll need the following materials:
- Concrete blocks (enough to form your desired fire pit shape)
- Fireproof mortar or sand
- A level
- A trowel
- Optional: decorative stones or glass for finishing touches
The cost can vary depending on your location and the specific materials chosen, but on average, you can expect to spend around $100-$200.
Step-by-Step Assembly Process
Assembling your concrete block fire pit is straightforward:
- Choose a safe location for your fire pit, away from flammable materials.
- Lay out your concrete blocks in the desired shape.
- Use fireproof mortar or sand to secure the blocks in place.
- Ensure the structure is level and stable.
Follow these steps, and you’ll have a functional fire pit in no time.
Customization Options
One of the benefits of a DIY concrete block fire pit is the ability to customize it to your taste. You can:
- Add decorative stones or glass around the fire pit.
- Use different patterns or colors for the concrete blocks.
- Incorporate seating or a cooking grill nearby.

These customization options allow you to personalize your outdoor space and make your fire pit truly unique.
02. Upcycled Metal Washing Machine Drum Fire Pit
You can create a unique fire pit by repurposing a metal washing machine drum, giving new life to an old item.
This DIY project not only reduces waste but also adds a personal touch to your outdoor space.
Sourcing and Preparing the Drum
To start, you’ll need to source a metal washing machine drum. You can find these at local salvage yards, online marketplaces, or through community recycling programs.
Once you’ve acquired the drum, clean it thoroughly to remove any debris or residue. Check for any sharp edges or rust spots that may need sanding or repair.
- Inspect the drum for any damage or excessive rust.
- Clean the drum using a wire brush and soapy water.
- Dry the drum completely to prevent rust.
Adding Legs and Heat-Resistant Paint
To elevate your fire pit and improve airflow, you’ll need to add legs. You can use metal rods or legs from an old table. Attach them securely to the drum using bolts or welding.
For a finishing touch, apply heat-resistant paint to protect the metal from high temperatures and add a decorative element to your fire pit.

Safety Considerations
When using your upcycled fire pit, ensure it’s placed on a stable, heat-resistant surface, away from flammable materials.
Always monitor the fire and have a fire extinguisher nearby. By taking these precautions, you can enjoy your DIY upcycled fire pit safely.
03. In-Ground Stone Fire Pit
If you’re looking for a more permanent and elegant fire pit solution, consider an in-ground stone design.
An in-ground stone fire pit can significantly enhance your outdoor living space, providing a warm and inviting ambiance for gatherings.
Digging and Preparing the Pit Area
Begin by selecting a safe location for your fire pit, away from flammable materials and overhanging branches.
Dig a pit that’s about 12 inches deep and slightly larger than the diameter of your intended fire pit. Ensure the pit is level and compact the soil at the bottom.
Stone Selection and Placement Techniques
Choose stones that are heat-resistant and suitable for outdoor use. Begin by placing a layer of gravel at the bottom of the pit for drainage.
Then, arrange your stones in a circular pattern, leaving space in the center for the fire. Use a level to ensure the stones are evenly placed.
Drainage Solutions
Proper drainage is crucial to prevent water accumulation in your fire pit. In addition to the gravel base, consider installing a drainage pipe if you’re in an area with heavy rainfall.
This will help maintain the integrity of your fire pit and ensure it remains safe to use.

04. Repurposed Brick Outdoor Fire Pit Circle
Repurposing old bricks to create an outdoor fire pit circle is a budget-friendly way to elevate your outdoor living area.
This DIY project not only adds warmth and ambiance to your backyard but also becomes a unique conversation piece when entertaining guests.

Finding Free or Low-Cost Bricks
Start by sourcing bricks from local classifieds, online marketplaces, or by visiting construction sites where leftover bricks are often available for the taking.
You can also check with friends or family members who may have bricks they’re willing to give away. Ensure the bricks are clean and in decent condition before using them for your project.
Creating Stable Circular Formations
To create a stable circular formation, begin by laying out your bricks in a circle, ensuring the diameter is large enough to accommodate your fire pit.
Use a level to ensure the bricks are even and adjust as necessary. You can use sand or gravel as a base to improve stability.
Adding a Gravel Base for Drainage
A gravel base is essential for drainage, preventing water from accumulating in your fire pit. Dig a shallow pit, fill it with gravel, and then lay your bricks on top.
This will ensure water drains away from the fire pit, reducing the risk of damage over time.
By following these steps, you can create a beautiful and functional repurposed brick outdoor fire pit circle that enhances your DIY backyard and provides a cozy ambiance for years to come.
05. Gabion Cage Fire Pit with River Rocks
If you’re looking for a unique fire pit design, consider building a gabion cage fire pit with river rocks.
This modern outdoor feature combines functionality with aesthetic appeal, creating a cozy ambiance in your backyard.

Building the Wire Cage Structure
To start, you’ll need to assemble the wire cage structure. Gabion cages are typically made from galvanized steel mesh, which is durable and resistant to corrosion.
You can purchase these cages at most hardware stores or online. The size of the cage will depend on your desired fire pit dimensions.
Filling with Decorative Stones
Once the cage is assembled, fill it with river rocks or other decorative stones.
River rocks are an excellent choice because they’re smooth, visually appealing, and can withstand high temperatures. Make sure to leave enough space in the center for your fire.
Heat Management Considerations
When using a gabion cage fire pit, it’s essential to consider heat management. Ensure that the surrounding area is clear of flammable materials and that you have a fire extinguisher nearby.
You may also want to add a layer of heat-resistant material at the bottom of the pit.
06. Portable Propane Outdoor Fire Pit Options Under $100
If you’re looking for a convenient and portable outdoor heating solution, a propane fire pit under $100 is a great option.
These fire pits offer the flexibility to be moved around your outdoor space as needed, making them perfect for gatherings or quiet nights under the stars.
Comparing Budget-Friendly Models
When comparing budget-friendly propane fire pits, consider the size, material, and features. Some models come with additional features like adjustable flames or windshields.
Look for durable materials that can withstand outdoor conditions. You can find a variety of models online, with prices starting from around $50.
Fuel Efficiency and Operating Costs
Propane fire pits are generally fuel-efficient, with some models consuming as little as 0.5 pounds of propane per hour.
The operating cost depends on the propane tank size and the frequency of use. On average, a 20-pound propane tank can last for several weeks or even months, depending on usage.

Portability Benefits
The portability of propane fire pits is one of their biggest advantages. You can easily move them to different locations, store them when not in use, or take them on camping trips.
This flexibility makes them an excellent choice for those who like to rearrange their outdoor space or enjoy outdoor activities in different locations.
07. Cinder Block and Steel Bowl Combination
Creating a cozy outdoor space just got a whole lot easier with a cinder block and steel bowl fire pit.
This DIY project is perfect for those looking to add warmth and ambiance to their backyard without breaking the bank.
To start, you’ll need to arrange the cinder blocks for stability. This involves creating a square or circular base that will support the steel bowl.
Arranging Cinder Blocks for Stability
Begin by laying out the cinder blocks in your desired configuration. Make sure the blocks are level and securely positioned. You can use a level tool to ensure the blocks are even.
- Choose a safe location for your fire pit, away from flammable materials.
- Stack the cinder blocks to the desired height, leaving space for the steel bowl.
Selecting an Affordable Fire Bowl
When choosing a steel bowl, consider the size and material. A larger bowl will provide more heat, but may be more expensive. Look for a bowl made from durable, heat-resistant materials.
You can find affordable steel bowls at most hardware stores or online.

Decorative Finishing Touches
Once your fire pit is assembled, you can add decorative touches. Consider adding some outdoor lighting or seating around the fire pit to create a cozy atmosphere.
You can also add some decorative rocks or gravel around the cinder blocks to enhance the appearance.
08. Terracotta Pot Fire Pit Conversion
You can breathe new life into an old terracotta pot by converting it into a cozy fire pit.
This DIY project is not only budget-friendly but also adds a unique touch to your outdoor decor. With a few simple steps, you can transform an old pot into a warm and inviting gathering spot.
Choosing the Right Size Pot
When selecting a terracotta pot for your fire pit, consider the size of your outdoor space and the number of people you plan to gather around it.
A larger pot can accommodate more people, but ensure it’s proportional to your garden or patio. Here are some factors to consider:
- Size: Larger pots for bigger gatherings
- Proportionality: Ensure the pot fits your outdoor space
- Material: Terracotta pots are ideal for their rustic charm
Creating a Safe Burning Surface
To create a safe burning surface, you’ll need to add a layer of heat-resistant material inside the pot. This can be achieved by using fireproof bricks or a metal insert. Here are the steps:
- Clean the pot thoroughly
- Add a layer of sand at the bottom
- Place fireproof bricks or a metal insert inside

Adding Decorative Elements
To enhance the visual appeal of your terracotta pot fire pit, consider adding decorative elements such as:
- Painting or sealing the pot for durability
- Adding decorative stones or gravel around the pot
- Incorporating outdoor lighting or fairy lights
By following these steps, you can create a beautiful and functional terracotta pot fire pit that becomes the centerpiece of your outdoor gatherings.
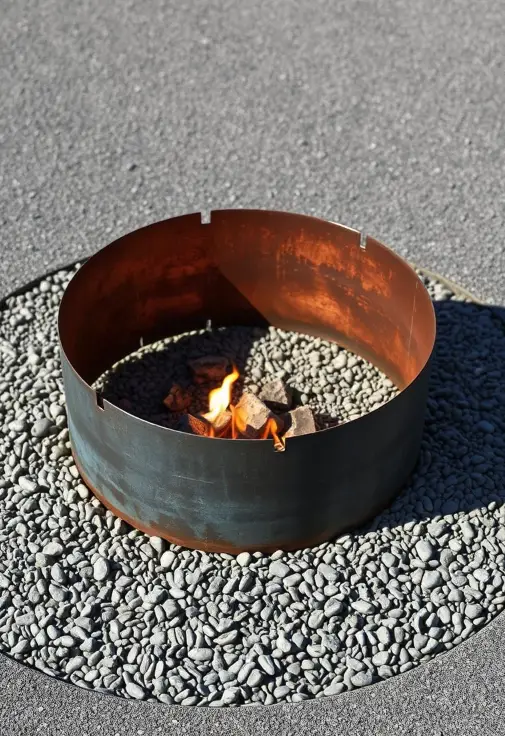
09. Recycled Steel Fire Ring with Gravel Surround
For a durable and low-maintenance fire pit, consider using a recycled steel fire ring with a gravel surround.
This option not only adds warmth and ambiance to your outdoor space but also does so in an eco-friendly and budget-conscious manner.
Finding Affordable Steel Rings
To find an affordable steel ring, you can:
- Check online marketplaces for second-hand steel rings.
- Visit local hardware stores for discounted or surplus materials.
- Explore salvage yards for reusable steel components.
When sourcing, ensure the steel ring is in good condition and suitable for high-temperature applications.
Creating a Safe Perimeter
Safety is paramount when installing a fire pit. To create a safe perimeter:
- Clear the area around the fire pit of flammable materials.
- Use gravel or sand to create a fire-resistant barrier.
- Ensure the fire pit is at a safe distance from structures and overhanging branches.
A gravel surround not only adds to the aesthetic but also helps in containing sparks.
Low-Maintenance Design Features
The design of your recycled steel fire ring with a gravel surround can be made low-maintenance by:
- Selecting a steel ring that is resistant to rust.
- Using a gravel that is easy to clean and maintain.
- Ensuring good airflow around the fire pit to reduce soot buildup.
By incorporating these features, you can enjoy your outdoor fire pit with minimal upkeep.
10. DIY Outdoor Fire Pit from Reclaimed Materials
Reclaimed materials offer a creative and budget-friendly way to build an outdoor fire pit that tells a story.
By repurposing old materials, you can create a unique and functional outdoor decor piece that adds warmth and character to your backyard.
Sourcing Free and Low-Cost Materials
To start, you’ll need to source materials that are durable and can withstand high temperatures. Consider visiting local construction sites or online marketplaces to find free or low-cost materials.
Pallet Wood and Metal Components
Pallet wood can be used for the outer structure, while metal components can be repurposed as the fire pit bowl or decorative elements.
Construction Site Leftovers
Construction sites often have leftover materials like bricks, stones, or metal pipes that can be used for your fire pit project.
Assembly Techniques for Durability
To ensure your fire pit is durable, use proper assembly techniques. Start by building a stable base, then add your fire pit bowl or ring, and finally, surround it with your chosen materials.
Rustic Finishing Ideas
To give your fire pit a rustic look, consider adding a distressed finish or using natural materials like stone or brick. You can also add decorative elements like metal straps or rivets.

11. Concrete Tree Ring Fire Pit
Transform your outdoor space with a concrete tree ring fire pit, a unique blend of natural elements and modern functionality.
This design combines the rustic charm of a tree ring with the warmth of a fire pit, creating a cozy focal point for your backyard.
Using Landscape Edging Materials
To create a concrete tree ring fire pit, you’ll need landscape edging materials.
These can be made from plastic, metal, or concrete, offering various styles to suit your outdoor decor. When selecting edging materials, consider durability and weather resistance.
- Choose materials that can withstand high temperatures.
- Consider the color and texture to match your outdoor space.
- Ensure the edging is sturdy enough to contain the concrete.
Proper Assembly for Heat Resistance
Assembling your concrete tree ring fire pit requires attention to heat resistance. Use a heat-resistant concrete mix and ensure the edging materials are securely in place.
- Prepare the site by clearing and leveling the ground.
- Assemble the edging materials according to the manufacturer’s instructions.
- Pour the heat-resistant concrete mix into the edging.
Decorative Top Edge Options
The top edge of your concrete tree ring fire pit offers opportunities for decorative touches. Consider adding stone, brick, or tile to create a unique look.

You can also use a decorative concrete finish or add a metal ring to enhance the design. These elements not only add visual appeal but also help to contain the fire.
12. Paver Stone Fire Pit with Mosaic Details
Creating a paver stone fire pit with mosaic details is a great DIY project that can add a personal touch to your outdoor space. You can customize the design to fit your style and budget.

Selecting Affordable Pavers
To start, you’ll need to select affordable pavers that fit your design. Consider using concrete or brick pavers, which are cost-effective and durable. You can find pavers at your local hardware store or home improvement center.
Creating Decorative Patterns
Once you have your pavers, you can create decorative patterns to enhance the visual appeal of your fire pit.
Consider using a circular or herringbone pattern to add visual interest. You can also incorporate mosaic details using colored tiles or glass.
Securing Pavers Safely
To ensure your paver stone fire pit is safe and stable, make sure to secure the pavers properly.
Use a sand base to provide drainage and prevent shifting. You can also use a fire pit ring or insert to contain the flames.
13. Sunken Conversation Pit with Central Fire Feature
Transform your backyard into a cozy retreat with a sunken conversation pit featuring a central fire.
This unique outdoor living space fosters intimate conversations and creates a warm ambiance, perfect for chilly evenings or special gatherings.

Excavation Planning and Process
Begin by planning the excavation. Consider the size and shape of your sunken pit, ensuring it’s large enough for comfortable seating.
Mark the area with stakes and twine, then start digging. You may need to hire professional help if the pit is deep or large.
- Determine the pit’s dimensions based on your available space and desired seating capacity.
- Check for underground utilities before you start digging.
- Use a level to ensure the pit’s edges are even.
Retaining Wall Construction
Once the pit is excavated, construct a retaining wall to secure the surrounding soil. You can use materials like stone, brick, or concrete blocks. Ensure the wall is sturdy and level.
- Choose materials that complement your outdoor decor.
- Use a drainage system to prevent water accumulation.
Drainage and Safety Considerations
Proper drainage is crucial to prevent water from accumulating in the pit. Install a drainage system, and consider adding a safety barrier around the pit, especially if you have children or pets.
- Use gravel or a French drain to direct water away from the pit.
- Install a railing or fence to prevent accidents.
By following these steps, you can create a beautiful sunken conversation pit with a central fire feature, enhancing your outdoor living experience.
14. Wheel Rim Outdoor Fire Pit Upcycle
An old wheel rim can become a beautiful and functional fire pit with a little creativity and some DIY effort.
Upcycling an old wheel rim into a fire pit is not only eco-friendly but also adds a unique touch to your outdoor decor.
Sourcing Used Wheel Rims
You can find used wheel rims at local junkyards, online marketplaces, or through friends and family who are getting rid of old vehicles. Make sure to inspect the rim for any damage or rust before purchasing.
Cleaning and Preparation
Clean the wheel rim thoroughly to remove any dirt, grime, or rust. Use a wire brush to scrub away any tough spots, and then apply a rust-inhibiting primer to protect the metal.

Adding Legs and Decorative Elements
Attach legs to the wheel rim to create a stable base for your fire pit. You can use metal rods or legs from an old table.
Add decorative elements like heat-resistant paint or metal trim to give your fire pit a personalized touch.
By following these steps, you can create a unique and functional wheel rim fire pit that becomes the centerpiece of your outdoor living space.
15. Multi-Purpose Fire Pit and Grill Combination
You can enhance your outdoor cooking experience with a fire pit that doubles as a grill. This versatile setup allows you to enjoy the ambiance of a fire pit while also having the functionality of a grill for cooking meals.
Designing for Dual Functionality
When designing a multi-purpose fire pit and grill combination, it’s essential to consider the dual functionality.
You need to ensure that the structure is safe for both cooking and gathering around.
Heat-Resistant Materials Selection
Choosing heat-resistant materials is crucial for the durability and safety of your multi-purpose fire pit.
Materials like stainless steel or cast iron are ideal for withstanding high temperatures.
Height and Accessibility Considerations
The height of your fire pit and grill combination should be comfortable for cooking and gathering. Ensure it’s accessible for all users.
Affordable Grill Grate Options
For a grill grate, you can opt for affordable options like a steel grate or a cooking grid. These materials are durable and can withstand high temperatures.

Switching Between Cooking and Ambiance
One of the benefits of a multi-purpose fire pit is the ability to switch between cooking and enjoying the ambiance. You can easily remove the grill grate when you want to enjoy the fire without cooking.
Maintaining Your Budget-Friendly Outdoor Fire Pit for Years to Come
Now that you’ve invested in a budget-friendly outdoor fire pit, it’s essential to maintain it properly to ensure it remains safe and functional.
Regular maintenance will extend the lifespan of your fire pit and keep it looking its best.
To keep your DIY fire pit in great condition, start by cleaning it regularly. Remove any debris, ashes, or food residue from the fire pit after each use. Use a wire brush to scrub away stubborn stains and grime.
For more thorough cleaning, mix baking soda and water to create a paste, and apply it to the affected areas.
Inspect your outdoor fire pit regularly for signs of wear and tear. Check for cracks, rust, or damage to the structure.
Make any necessary repairs promptly to prevent further damage. Store your fire pit properly during the off-season to protect it from harsh weather conditions.
Cover it with a waterproof cover or store it in a dry, sheltered area.
By following these simple DIY fire pit care tips, you’ll be able to enjoy your budget-friendly fire pit for years to come.
Proper outdoor fire pit maintenance is key to ensuring it remains a safe and enjoyable focal point for your outdoor gatherings.


