How to Preserve Flowers: 7 Natural Steps for Long-Lasting Charm
Did you know that preserving flowers can extend their beauty for months or even years? This simple yet elegant technique allows you to enjoy your favorite blooms long after they’ve faded.

You can preserve flowers using natural methods that are easy to follow and require minimal equipment. Our guide will walk you through 7 natural steps to achieve long-lasting charm.
By preserving flowers, you can create beautiful, lasting arrangements that capture the essence of special moments.
Whether you’re looking to preserve a bouquet or simply enjoy your garden flowers for longer, our step-by-step instructions will help you achieve professional-looking results.
The Timeless Beauty of Preserved Flowers
When you preserve flowers, you’re not just saving their beauty; you’re also holding onto the memories they represent.
Preserving flowers allows you to extend the life of a special bouquet, keeping the emotions and moments associated with it alive.
This practice has become increasingly popular as people seek to cherish their memories in a more tangible way.

Why People Preserve Flowers
People preserve flowers for various reasons, including to commemorate special occasions like weddings, anniversaries, or the loss of a loved one.
Preserved flowers serve as a reminder of happy memories or significant events, providing comfort and nostalgia.
By preserving flowers, individuals can keep these memories close, even as the flowers themselves age.
Benefits of Natural Preservation Methods
Natural preservation methods offer several benefits, including the avoidance of harsh chemicals and the preservation of the flowers’ natural appearance.
Techniques like air-drying, pressing, and using silica gel or glycerin allow you to maintain the integrity of the flowers while extending their lifespan.
These methods are not only eco-friendly but also provide a unique, personal touch to the preserved flowers.
Understanding How to Preserve Flowers Naturally
Understanding the natural ways to preserve flowers can help you enjoy their beauty for years to come.
Preserving flowers is not just about maintaining their physical appearance but also about capturing the memories associated with them.
The Science Behind Flower Preservation
Flower preservation involves halting the natural process of decay that occurs in flowers after they’re cut.
This is achieved by controlling the factors that contribute to their deterioration, such as moisture, bacteria, and fungi.
One common method is flower drying, which removes the moisture from the flowers, thereby preventing the growth of bacteria and fungi.
The science behind it involves understanding the role of humidity, temperature, and air circulation in the drying process.

Natural vs. Chemical Preservation Methods
When it comes to preserving flowers, you have the option to choose between natural and chemical preservation methods.
Natural preservation methods are preferred for their eco-friendly and non-toxic approach. These methods include air-drying, pressing, and using desiccants like silica gel.
On the other hand, chemical preservation methods involve using substances that can alter the composition of the flowers.
While chemical methods can provide more durable results, they may not be as appealing to those looking for environmentally friendly options.
Understanding the differences between these methods will help you choose the best approach for your needs, focusing on natural preservation methods that are both effective and sustainable.
Best Flowers for Preservation
The journey to beautifully preserved flowers begins with understanding which flowers preserve well.
Not all flowers are suitable for preservation, and the right choice can make a significant difference in the outcome.

Flowers That Preserve Well
Some of the best flowers for preservation include roses, lavender, and baby’s breath.
These flowers have a robust structure that holds up well to the drying process, resulting in beautiful dried flowers.
Roses, for instance, retain their shape and color, making them a popular choice for preservation.
- Roses
- Lavender
- Baby’s Breath
Flowers That Are Challenging to Preserve
On the other hand, flowers like orchids and tulips are more challenging to preserve due to their delicate petals.
These flowers require extra care and specific preservation methods to achieve the desired results. Understanding the characteristics of each flower type is crucial for successful preservation.
When to Harvest Flowers for Optimal Preservation
The key to preserving flowers lies in understanding when to harvest them. Harvesting at the right time ensures that your flowers are at their best for preservation, whether you’re air-drying, pressing, or using another method.
Best Time of Day to Cut Flowers
Cutting flowers at the right time of day is crucial. Generally, the best time is early morning, just after the dew has dried but before the heat of the day.
This timing helps prevent moisture loss and reduces the risk of wilting. For some flowers, like roses, cutting in the late afternoon can also be beneficial as they’ve had a full day of photosynthesis.
- Early morning: Ideal for most flowers
- Late afternoon: Suitable for certain flowers like roses
Ideal Growth Stage for Preservation
The growth stage at which you harvest flowers affects their preservation. For most flowers, the optimal stage is just before they reach full bloom.
This stage ensures they’re mature enough to retain their color and shape but not so mature that they begin to wilt or drop petals.

Essential Tools and Materials for Flower Preservation
The art of flower preservation begins with gathering the right tools and materials. Having the correct supplies on hand will make the preservation process smoother and more effective.
Basic Supplies You’ll Need
To get started with preserving flowers, you’ll need some basic supplies. These include:
- Fresh flowers of your choice
- Scissors or pruning shears
- Twine or string for hanging
- A well-ventilated area for drying
- Books or a flower press for pressing
These basic supplies will allow you to begin preserving flowers using various methods.
Optional Tools for Advanced Techniques
For those looking to explore more advanced preservation techniques, additional tools can be useful. These may include:
- Silica gel for dimensional preservation
- Glycerin for a soft, flexible finish
- Sand for drying and preserving flowers
- A microwave for quick drying
- Wax for a glossy finish
These optional tools can help you achieve different effects and expand your preservation repertoire.

By having the right tools and materials, you can ensure that your flower preservation efforts are successful and enjoyable.
Step 1: Air-Drying – The Classic Preservation Method
Preserving flowers through air-drying is a classic technique that requires minimal equipment. This method allows you to maintain the natural beauty of your flowers while extending their lifespan.
Air-drying is particularly effective for certain types of flowers, and when done correctly, it can produce beautifully preserved blooms.

How to Hang Dry Flowers Properly
To air-dry flowers, you need to hang them upside down in a cool, dry, dark place. This method helps preserve the flowers’ color and structure. Here’s a step-by-step guide:
- Gather flowers into small bunches.
- Tie the stems together with a string or twine.
- Hang the bunches upside down.
- Ensure good air circulation around the flowers.
It’s essential to check on the flowers periodically to ensure they are drying properly and not developing mold.
Best Flowers for Air-Drying
Not all flowers dry well, but many types respond beautifully to air-drying. Some of the best flowers for this method include:
- Lavender
- Baby’s Breath
- Roses
- Statice
These flowers retain their color and shape when dried, making them ideal for arrangements and crafts.
Troubleshooting Air-Dried Flowers
Sometimes, air-dried flowers may not turn out as expected. Common issues include mold, discoloration, or excessive dryness. To avoid these problems:
- Ensure the drying area is well-ventilated.
- Avoid drying flowers in humid environments.
- Check on the flowers regularly.
By following these tips, you can successfully air-dry flowers and enjoy their beauty for a long time.
Step 2: Pressing – Preserving Flowers in Books and Frames
You can preserve flowers by pressing them, a technique that retains their beauty. Pressing flowers is a simple yet effective method for maintaining their delicate charm.
This technique involves removing the moisture from the flowers, flattening them, and preserving their intricate details.
Traditional Book Pressing Technique
To press flowers using the traditional book pressing technique, you’ll need a few heavy books, some absorbent paper (like blotting paper or paper towels), and the flowers you wish to preserve.
Place a flower between two sheets of absorbent paper and position it within the pages of a heavy book. Ensure the flower is not touching any other flowers or the book’s spine.
Close the book and stack additional heavy books on top. Check on your flowers periodically, replacing the absorbent paper as needed until they are fully dried and pressed.

Using a Flower Press for Better Results
A flower press is a specialized tool designed specifically for pressing flowers. It provides even pressure across the flowers, ensuring they dry flat and retain their shape.
To use a flower press, place a flower between two sheets of absorbent paper, and then position it between the press’s cardboard sheets.
Tighten the press’s screws to apply even pressure. A flower press can dry flowers more evenly and sometimes more quickly than the traditional book method.
Creating Art with Pressed Flowers
Once your flowers are pressed, you can create beautiful art pieces. You can frame them, use them in collages, or incorporate them into decorative designs.
To create a framed piece, arrange your pressed flowers on a background, such as colored paper or fabric, and then place them in a frame.
You can also use a decoupage medium to adhere the flowers to the background, adding a protective layer.
With these techniques, you can enjoy your favorite flowers for years to come, preserving their beauty and the memories they hold.
Step 3: Silica Gel – For Dimensional Preservation
For a method that preserves the dimensional integrity of your flowers, silica gel is an excellent choice. Silica gel is a desiccant that absorbs moisture from flowers, preserving their shape and structure.
This method is particularly effective for delicate flowers that you want to keep looking fresh and vibrant.
How to Use Silica Gel Effectively
To use silica gel effectively, start by selecting a container that is airtight. Fill the bottom of the container with a layer of silica gel.
Gently place your flowers on top of this layer, making sure they do not touch each other or the sides of the container.
Then, carefully pour more silica gel around and over the flowers until they are completely covered. Seal the container and let it sit for the recommended drying time.
You can check on your flowers periodically to see if they are dry. The drying time can vary depending on the moisture content of the flowers and the humidity of your environment.
It’s essential to be patient and not rush this process to achieve the best results.

Drying Time and Storage Tips
The drying time when using silica gel can range from a few days to a couple of weeks.
Once your flowers are dry, carefully remove them from the silica gel and gently brush off any remaining gel from the flowers.
Store your preserved flowers in a cool, dry place, away from direct sunlight to maintain their color and structure.
Reusing Silica Gel for Future Projects
One of the benefits of using silica gel is that it can be reused. To reactivate silica gel, simply spread it out on a baking sheet and heat it in a low-temperature oven (around 200°F) for a few hours.
Let it cool completely before storing it in an airtight container for future use. This makes silica gel a cost-effective and environmentally friendly option for flower preservation.
Step 4: Glycerin Preservation – For Soft, Flexible Results
You can preserve the delicate beauty of flowers using glycerin, resulting in soft and flexible blooms.
This method is particularly effective for maintaining the natural appearance and feel of the flowers.
Glycerin preservation involves replacing the water in the flowers with glycerin, a process that prevents decay and retains flexibility.

The Glycerin Solution Method
To preserve flowers using glycerin, you need to prepare a glycerin solution. Mix one part glycerin with two parts water. The ideal ratio may vary depending on the type of flowers you are preserving.
Heat the mixture gently to help dissolve the glycerin thoroughly. Once the solution is ready, place the stems of the flowers into it, making sure that the flowers are fully submerged.
Leave the flowers in the glycerin solution for a period that can range from a few days to several weeks.
The exact duration depends on the flower type and their moisture content. Check the flowers periodically to determine when they have reached the desired level of preservation.
Which Flowers Work Best with Glycerin
Not all flowers are suitable for glycerin preservation. Those with thicker petals and more robust structures tend to work best.
Examples include hydrangeas, baby’s breath, and certain types of foliage. Delicate flowers may not retain their shape or may become too soft, so it’s essential to choose flowers that are appropriate for this method.
Troubleshooting Glycerin Preservation Issues
If the flowers become too soft or develop mold, it may be due to incorrect glycerin concentration or insufficient monitoring.
Adjusting the glycerin-to-water ratio or changing the solution periodically can help mitigate these issues.
Ensuring that the flowers are not overcrowded and that the solution is not contaminated can also improve results.
Step 5: Sand Preservation – An Ancient Technique
The art of preserving flowers with sand is a centuries-old technique worth trying.
This method involves using sand as a drying medium to preserve flowers, maintaining their shape and structure.

Using Sand as a Drying Medium
To preserve flowers using sand, you’ll need a container, fine-grained sand, and the flowers you want to preserve. Start by filling the container with a layer of sand.
Gently place the flowers on top of the sand, making sure they don’t touch each other. Then, slowly pour more sand over the flowers, covering them completely.
The type of sand used is crucial. Fine-grained sand works best as it can fill in the spaces between the petals and support the flower’s structure.
You can also mix the sand with other materials like borax or cornmeal to improve its drying properties.
Tips for Perfect Sand-Preserved Flowers
To achieve perfect results, follow these tips:
- Use fresh flowers for the best results.
- Make sure the sand is completely dry before using it.
- Avoid over-handling the flowers during the preservation process.
- Store the preserved flowers in a cool, dry place.
By following these steps and tips, you can successfully preserve flowers using the ancient technique of sand preservation.
This method not only dries the flowers but also helps maintain their natural shape and beauty.
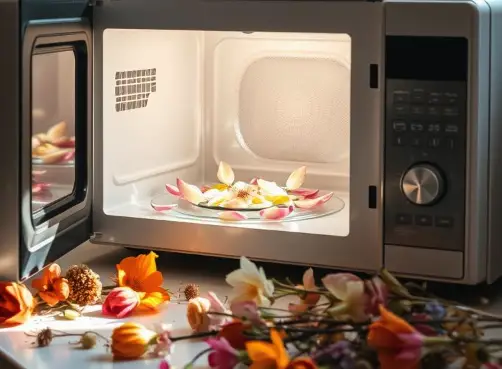
Step 6: Microwave Drying – Quick Preservation Method
For those looking to preserve flowers swiftly, microwave drying is a technique worth exploring.
This method allows you to dry flowers quickly while maintaining their color and structure.
Microwave drying is particularly useful when you need to preserve flowers rapidly for an event or special occasion.

Safe Microwave Drying Techniques
To dry flowers safely in the microwave, follow these steps:
- Place the flowers between two paper towels to absorb moisture.
- Microwave on a low setting in short intervals (initially 30 seconds).
- Check the flowers after each interval to avoid overheating.
- Repeat the process until the flowers are dry.
It’s crucial to monitor the flowers closely to prevent them from getting scorched or catching fire. The goal is to dry the flowers, not to cook them.
Combining Microwave with Silica Gel
For more effective drying, you can combine microwave drying with silica gel. Silica gel helps to absorb moisture from the flowers more efficiently.
- Fill a microwave-safe container with silica gel.
- Bury the flowers in the silica gel, ensuring they are fully covered.
- Microwave the container for short intervals (start with 30 seconds).
- Check the flowers and repeat the process until they are dry.
Using silica gel with microwave drying can help preserve the flowers’ shape and color more effectively than using microwave drying alone.
Step 7: Wax Preservation – For a Glossy Finish
For a glossy finish, wax preservation is the perfect technique to use on your preserved flowers.
This method not only adds a touch of elegance to your arrangements but also helps protect the flowers from damage.
Wax preservation is a simple yet effective way to maintain the beauty of your flowers.
Dipping Flowers in Wax
To dip flowers in wax, you will need a few basic supplies, including wax, a thermometer, and a dipping container. Here are the steps to follow:
- Melt the wax in the dipping container to the recommended temperature.
- Carefully dip the flower into the melted wax, making sure to coat it evenly.
- Remove the flower from the wax and let it cool and harden.
You can use different types of wax, such as paraffin or soy wax, depending on your preference.
It’s essential to monitor the temperature of the wax to avoid overheating, which can damage the flower.

Maintaining Wax-Preserved Flowers
To keep your wax-preserved flowers looking their best, follow these maintenance tips:
- Avoid exposing the flowers to direct sunlight or heat.
- Dust the flowers gently with a soft-bristled brush to remove any debris.
- Store the flowers in a cool, dry place to prevent damage.
By following these tips, you can enjoy your wax-preserved flowers for a long time. Wax preservation is a great way to add a touch of elegance to your arrangements and keep your flowers looking fresh and beautiful.
Common Mistakes to Avoid When Preserving Flowers
To ensure your preserved flowers remain vibrant and intact, it’s vital to steer clear of common preservation pitfalls.
Preserving flowers is an art that requires attention to detail and a understanding of the potential mistakes that can occur during the process.

Timing Errors in Flower Collection
One of the most critical factors in preserving flowers is timing. Collecting flowers at the wrong time can significantly impact the preservation outcome.
For instance, picking flowers when they are too wet or too dry can affect their ability to be preserved effectively.
Storage and Display Mistakes
Proper storage and display are crucial for maintaining the quality of preserved flowers.
Exposing them to direct sunlight, moisture, or extreme temperatures can cause deterioration. It’s essential to store them in a cool, dry place, away from direct sunlight.
Preservation Method Mismatches
Different flowers require different preservation methods. Using the wrong method can lead to disappointing results.
For example, some flowers are best preserved through air-drying, while others may require silica gel or glycerin.
Understanding the best method for each type of flower is key to successful preservation.
Keeping the Memory Alive: The Lasting Joy of Preserved Blooms
Preserving flowers is more than just a hobby; it’s a way to capture memories and emotions, turning them into lasting treasures.
When you preserve flowers, you’re not just saving their beauty; you’re holding onto the moments they represent.
The joy of preserved flowers lies in their ability to transport you back to a special moment in time.
Whether it’s a wedding bouquet, a gift from a loved one, or a simple bouquet picked on a memorable day, preserved flowers become a tangible connection to your past.
They allow you to relive happy memories and share them with others, creating a sense of continuity and love.
By following the natural preservation methods outlined in this guide, you can enjoy your preserved flowers for years to come, cherishing the memories they hold.
The process of preserving flowers is a labor of love, and the end result is a beautiful, lasting reminder of life’s precious moments, creating lasting memories that you can treasure forever.

