16 Brilliant Diorama Ideas to Make Projects Stand Out
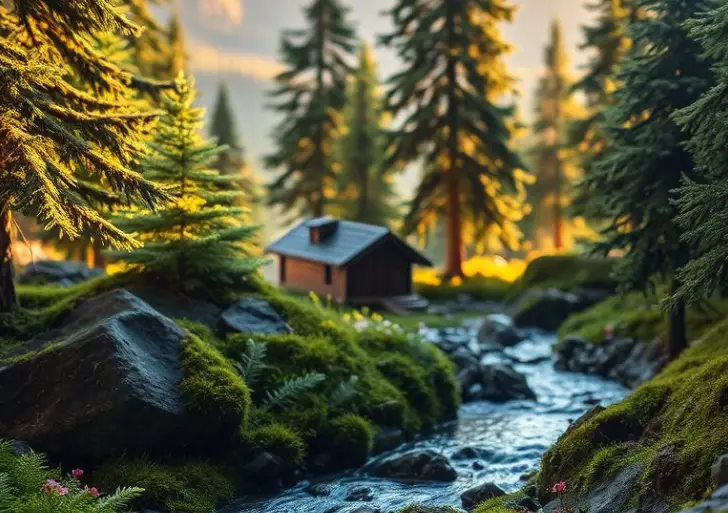
Did you know that creating a DIY diorama can be a fun and engaging way to bring your projects to life? Whether you’re a student, artist, or hobbyist, dioramas offer a unique way to showcase your creativity and tell a story.

You can explore creative diorama projects that range from simple to complex, making them accessible to everyone. In this article, we’ll dive into 16 brilliant diorama ideas that will inspire you to create something truly special.
From conceptualizing your project to bringing it to life, we’ll guide you through the process, providing you with the tools and inspiration needed to make your next project stand out.
Crafting Miniature Worlds That Tell Stories
Crafting a diorama is an art form that allows you to create miniature worlds where stories come alive.
You can bring your imagination to life by designing intricate scenes that captivate and engage viewers. Through diorama crafting, you’re not just building a model; you’re creating a three-dimensional narrative that draws people in.
The Power of Three-Dimensional Storytelling
Three-dimensional storytelling has the power to immerse viewers in a way that flat images or text cannot.
By crafting a diorama, you can convey complex stories or emotions through the arrangement of elements within the scene.
This form of storytelling encourages creativity and can be a compelling way to communicate ideas or preserve memories.

Essential Tools and Materials for Any Diorama
To start crafting a diorama, you’ll need some basic tools and materials. These can include a container or base, modeling clay, paint, and various decorative items depending on the theme.
Essential tools might comprise a craft knife, glue, and paintbrushes. The choice of materials can significantly affect the overall look and feel of your diorama, so selecting the right ones is crucial.
Planning Your Project for Success
Before you begin building your diorama, planning is key to success. Decide on the story you want to tell or the scene you wish to recreate.
Sketch out your ideas and consider the scale and proportions of the elements within your diorama. Planning will help you achieve a cohesive and visually appealing final product that effectively tells your story.
01. Underwater Seascape Diorama
Creating an underwater seascape diorama is a fascinating project that brings the beauty of the ocean to your home decor. This unique DIY home decor piece can be a captivating addition to any room.
Materials for Creating Ocean Depths
To start, you’ll need materials that can mimic the ocean’s depths. These include blue-tinted resins, gel mediums, and water effect liquids. You can also use dark blues and greens to paint the background, creating an illusion of depth.
- Blue-tinted resin
- Gel medium
- Water effect liquid
- Dark blue and green paints
Techniques for Water Effects
Achieving a realistic water effect is crucial for an underwater diorama. You can use various techniques to create this effect.
Resin Pouring Methods
Resin pouring involves mixing resin with pigments and pouring it into the diorama to create a glossy, water-like effect.
Gel and Gloss Medium Alternatives
Alternatively, you can use gel or gloss mediums to achieve a similar effect without the need for resin.

Marine Life and Coral Reef Creation
To populate your ocean diorama, you’ll need to create or acquire models of marine life and coral reefs. These can be made from clay, paper, or purchased as pre-made models.
02. Rainforest Ecosystem Diorama
Building a rainforest ecosystem diorama allows you to explore the rich biodiversity and layered structure of rainforests. This project involves creating a miniature world that captures the intricate details and complex interactions within a rainforest.
Layering Vegetation for Depth
To create a convincing rainforest diorama, you need to layer vegetation to achieve depth. Start with a base layer of large foliage, then add mid-level plants, and finally, include smaller plants and details like mosses and ferns.
Creating Canopy and Understory
The canopy and understory are crucial elements of a rainforest diorama. Use a combination of materials like cardboard, foam, and real or artificial leaves to create a layered effect.
The canopy should be dense, while the understory can be more sparse, allowing for glimpses of the forest floor.
Incorporating Rainforest Wildlife
Adding wildlife brings your rainforest diorama to life. Consider including animals like birds, monkeys, and insects.
Positioning Animals Naturally
Place animals in natural poses, such as birds perched on branches or monkeys climbing trees.
Adding Hidden Creatures for Discovery
Hide some creatures to encourage viewers to explore the diorama closely, adding an element of discovery.

By layering vegetation, creating a canopy and understory, and incorporating wildlife, you can create a captivating rainforest ecosystem diorama that showcases the beauty and complexity of these ecosystems.
03. Historical Battle Scene Diorama
A historical battle scene diorama is more than just a model; it’s a storytelling device that requires careful planning. To create an engaging and accurate representation of a historical battle, you need to focus on several key elements.
Researching Period-Accurate Details
Start by researching the battle you want to recreate. Gather reference images, read historical accounts, and study the uniforms, weapons, and terrain of the period. This will help you achieve accuracy in your diorama.
Terrain Building Techniques
The terrain is a crucial aspect of a battle scene diorama. You can use various materials like clay, foam board, or papier-mâché to create hills, valleys, and other features. Consider the scale of your diorama when choosing materials and techniques.

Figurine Positioning for Dynamic Action
Positioning your figurines correctly is vital for creating a dynamic scene. Consider the action and movement you want to convey.
Creating Movement Illusions
To create the illusion of movement, you can pose figurines in dynamic positions or use creative techniques like tilting or angling the figures.
Telling the Battle Story
The arrangement of your figurines should tell the story of the battle. Consider the narrative you want to convey and position your figures accordingly.
By focusing on these elements, you can create a compelling historical battle scene diorama that captures the essence of the event.
04. Space Exploration Diorama
Creating a space exploration diorama is an exciting project that lets you explore the wonders of the universe.
You can capture the essence of space travel, from the vastness of cosmic backgrounds to the intricate details of spacecraft and astronauts.
Cosmic Background Creation
The background of your diorama sets the tone for the entire scene.
To create a realistic cosmic backdrop, you can use a combination of dark blues and purples, sprinkled with glitter or small LED lights to mimic stars. Consider adding a gradient effect to give depth to your space scene.
Spacecraft and Astronaut Detailing
Detailing your spacecraft and astronauts is crucial for a realistic diorama. Research the specific spacecraft you’re modeling and replicate its features accurately.
For astronauts, consider their poses and the equipment they’re using, like tethers or tools, to add authenticity.
Special Effects for Zero Gravity
To simulate zero gravity, you can use various techniques. Suspension Techniques involve using thin wires or threads to make objects appear as if they’re floating.
Lighting for Stellar Phenomena can also enhance the zero-gravity effect by creating a sense of depth and atmosphere.
Suspension Techniques
Use transparent threads or fine wires to suspend astronauts or objects, making sure they’re not visible against the dark background.
Lighting for Stellar Phenomena
Strategically place LED lights to create a sense of glow around your spacecraft or to highlight distant stars, enhancing the cosmic feel.

05. Miniature City Skyline Diorama
Designing a city diorama allows you to capture the essence of urban architecture in a small scale. You can recreate the excitement of a metropolitan area in a compact form, making it a fascinating project for anyone interested in cityscapes.
Architectural Scale Considerations
When building a miniature city, it’s crucial to decide on a scale that works for you. A common scale for dioramas is 1:100 or 1:200.
This scale allows for detailed buildings without making the diorama too large. You should consider the space you have available and the level of detail you want to achieve.
Building Construction from Everyday Materials
You can construct buildings using a variety of materials, such as cardboard, foam board, or even 3D printing.
Cardboard is a versatile and easily accessible material that can be cut and shaped to create different structures. You can also use paint and markers to add details and textures to your buildings.

Adding Urban Life Elements
To make your city diorama more engaging, you can add elements that depict urban life. This includes miniature people, vehicles, and street furniture.
Street Level Details
Adding street-level details such as lamp posts, benches, and street signs can enhance the realism of your diorama. You can also include shops and restaurants with tiny signs and menus.
Nighttime Illumination
To create a nighttime effect, you can use small LED lights or glow-in-the-dark paint to illuminate your buildings and streets. This adds an extra layer of realism and visual interest to your diorama.
06. Seasonal Forest Diorama
Creating a seasonal forest diorama is a great way to showcase your creativity and attention to detail. You can capture the essence of the forest in different seasons, from the lush greenery of summer to the snow-covered trees of winter.
Tree Creation Techniques
To create realistic trees, you can use a variety of materials such as twigs, branches, and wire.
You can also use modeling clay or paper mache to create the tree trunks and branches. For the foliage, you can use small leaves, moss, or even tiny flowers.
To add depth to your diorama, you can create a layered effect by placing trees at different distances from the viewer.
You can also use different textures and colors to create a sense of depth and dimensionality.

Seasonal Color Palettes
The color palette is crucial in capturing the essence of the season. For example, you can use shades of green and brown for a summer diorama, while autumn can be represented with warm colors like orange, red, and yellow.
- Summer: greens, browns, blues
- Autumn: oranges, reds, yellows
- Winter: whites, grays, blues
- Spring: pastels, greens, browns
Wildlife Integration Strategies
To bring your diorama to life, you can add wildlife elements such as animals, birds, or insects. You can use figurines, models, or even create your own using clay or paper mache.
Animal Positioning
When positioning animals, consider their natural behavior and habitat. For example, you can place deer grazing near a stream or birds perched on a tree branch.
Natural Habitat Elements
To create a realistic habitat, you can add elements like rocks, logs, and plants. You can also use different textures and colors to create a sense of depth and dimensionality.
07. Desert Oasis Diorama
A desert oasis diorama offers a unique opportunity to showcase the beauty of contrasting environments in a single, captivating scene.
You can combine the harsh, arid conditions of the desert with the lush tranquility of an oasis, creating a visually striking and thought-provoking piece.
Sand Texturing Methods
To create a realistic desert environment, you’ll need to texture the sand effectively. You can achieve this by:
- Using fine-grained sand or powder
- Mixing sand with small pebbles or stones for varied texture
- Applying a matte finish to reduce shine
Rock Formation Sculpting
Sculpting rock formations adds depth and character to your diorama. Consider using:
- Air-dry clay or modeling paste
- Texturing tools or household items to create realistic rock surfaces
Creating Realistic Water Features
Water features are crucial in an oasis diorama. To create a realistic effect:
- Use clear resin or varnish for a reflective surface
- Add subtle wave or ripple effects
Reflective Surface Techniques
To enhance the realism of your water feature, apply a reflective surface technique by using a glossy finish or adding a mirror-like effect.
Desert Flora Placement
Strategically place desert flora around your oasis to create a natural, balanced look. Consider the scale and distribution of plants to enhance the visual appeal.

08. Prehistoric World Diorama Ideas
Imagine a world before humans, where dinosaurs roamed and volcanoes erupted – this is what you can create with a prehistoric diorama.
Bringing the ancient past to life in a three-dimensional scene can be a fascinating project, allowing you to explore the era of the dinosaurs and beyond.
Dinosaur Selection and Scaling
Choosing the right dinosaurs for your prehistoric diorama is crucial. Consider the era you’re depicting, such as the Jurassic or Cretaceous period, and select dinosaurs that lived during that time.
Scaling is also important; ensure that the dinosaurs are proportional to each other and to the landscape.
Ancient Landscape Recreation
Recreating an ancient landscape involves more than just placing dinosaurs on a flat surface.
You need to create a believable terrain, including hills, valleys, and possibly even water bodies. Using materials like clay, sand, or paper mache can help achieve a realistic texture.
Volcanic and Primordial Elements
To add an extra layer of authenticity, incorporate volcanic and primordial elements into your diorama. This can include:
- Lava flows
- Volcanic ash
- Prehistoric plant life
Lava Flow Effects
Creating lava flow effects can be achieved by using molten-looking materials or paints that resemble lava. You can also add texture to give it a more realistic appearance.
Prehistoric Plant Life
Incorporating prehistoric plants, such as ferns or cycads, can enhance the authenticity of your diorama. You can create these plants using wire, clay, or paper.

09. Fairy Tale Castle Diorama
Imagine stepping into a whimsical world where fairy tale castles touch the sky, all within the confines of a diorama.
Creating a fairy tale castle diorama is an exciting project that combines creativity with technical skill, allowing you to bring your favorite fairy tales to life.
Architectural Fantasy Elements
When designing your castle, consider incorporating fantasy elements such as towers, turrets, and grand entrances.
You can use a variety of materials like cardboard, foam board, or even 3D printing to create the castle’s structure.
Magical Landscape Creation
The landscape around your castle is just as important as the castle itself. To create a magical atmosphere, you can use a combination of paint, moss, and small plants to mimic a fairy tale forest or mountain range.
Character Integration
Characters are a crucial part of any fairy tale. You can add figurines or create your own characters using clay or paper to populate your diorama.
Consider the story you want to tell and choose characters that fit the narrative.
Fairy Tale Scene Selection
Choose a scene from your favorite fairy tale to depict in your diorama. This could be a pivotal moment, like Cinderella’s arrival at the ball or Sleeping Beauty’s awakening.
Enchanted Lighting Effects
Lighting can add an extra layer of magic to your diorama. Use LED lights or glow sticks to create a warm glow or to highlight specific elements, such as the castle windows or a character’s crown.

Some key elements to consider when creating your fairy tale castle diorama include:
- Selecting a fairy tale scene that inspires you
- Designing a castle that fits the story
- Creating a magical landscape
- Incorporating characters and details that bring the story to life
10. Post-Apocalyptic Wasteland Diorama
Imagine a world ravaged by disaster, where the remnants of civilization lie in ruins – this is the essence of a post-apocalyptic wasteland diorama.
Weathering and Distressing Techniques
To create a realistic post-apocalyptic wasteland, you’ll need to apply weathering and distressing techniques to your diorama’s surfaces. You can use materials like sand, dust, and paint to achieve a worn, aged look.
Some techniques to try include drybrushing, washes, and texture paste. Experiment with different methods to achieve the desired effect.
Abandoned Structure Creation
Abandoned structures are a key element of a post-apocalyptic wasteland diorama. You can create buildings using cardboard, foam board, or 3D printing.
Add details like broken windows, crumbling walls, and overgrown vegetation to create a sense of decay.
Storytelling Through Details
The details in your diorama can tell a story and draw the viewer in. Consider adding elements like survivor debris, abandoned vehicles, or environmental hazards.
Survivor Elements
Add personal touches like abandoned backpacks, makeshift shelters, or scavenged supplies to hint at the presence of survivors.
Environmental Hazard Representation
Include elements like toxic waste, radiation signs, or fallen power lines to create a sense of danger and unease.

11. Four Seasons in One Diorama
You can capture the essence of each season in a single diorama with careful planning. This unique project allows you to showcase your creativity and attention to detail.
Quadrant Division Strategies
Dividing your diorama into four quadrants is a straightforward way to represent each season. You can use a simple grid or create a more complex division that complements your design.
- Use a grid to ensure equal space for each season.
- Consider a circular or radial division for a more dynamic look.
- Plan the transition areas between seasons carefully.
Creating Seamless Seasonal Transitions
To create a cohesive look, you need to plan the transitions between the different seasons. This can be achieved by using continuous landscape features or a unified color palette.
Unified Design Elements
Unified design elements are crucial for a visually appealing diorama. Consider using consistent materials or colors across the different seasons.
Continuous Landscape Features
A continuous landscape feature, such as a river or a mountain range, can help tie the different seasons together.
Color Harmony Across Seasons
Using a harmonious color scheme across the seasons can create a sense of cohesion. Choose colors that complement each other and reflect the mood of each season.

12. Book Scene Diorama
Creating a diorama inspired by a literary work allows you to capture the essence of the story. You can bring your favorite scenes to life by recreating characters, settings, and key elements from the narrative.
Literary Moment Selection
When choosing a scene from a book to diorama, consider pivotal moments that evoke strong imagery.
You can select a dramatic turning point, a serene landscape, or an intimate character moment. Think about what resonates with you and what you’d like to recreate.
- Identify key characters and their roles in the scene
- Note the setting, including the time period and location
- Consider the emotions and atmosphere of the scene
Character and Setting Recreation
To recreate characters and settings, you’ll need to gather materials that fit the narrative. You can use a variety of materials, such as clay, fabric, or paper, to create figurines, backdrops, and other elements.

Incorporating Text Elements
Incorporating text elements can enhance the literary feel of your diorama. You can include quotes, book pages, or other written elements to add depth.
Quote Integration Methods
You can integrate quotes by writing them on the background, on scrolls, or even on small plaques within the diorama. Choose a quote that resonates with the scene you’re recreating.
Book Page Backgrounds
Using book pages as backgrounds can add a layer of literary significance. You can decoupage pages onto the back or bottom of the diorama or use them to create a collage.
13. Shoebox Habitat Diorama
Creating a shoebox diorama is an engaging way to learn about different habitats. This project is perfect for students and nature enthusiasts alike, as it allows you to explore and showcase various ecosystems in a compact and creative way.
Space Maximization Techniques
To maximize space in your shoebox diorama, consider the following techniques:
- Use layers to create depth, such as a background, mid-ground, and foreground.
- Select materials that are small in scale but rich in detail.
- Utilize the corners and edges of the shoebox to add additional elements.
Background Creation in Limited Depth
Creating a convincing background in a shoebox diorama requires some creativity. You can:
- Paint the inside of the shoebox lid to create a sky or water effect.
- Use colored paper or cardstock to create a background that can be glued inside the box.
- Add texture with materials like fabric, sand, or small rocks.

Educational Element Integration
To make your shoebox diorama educational, you can incorporate several elements:
Species Information Cards
Create cards that provide information about the plants and animals in your diorama. This can include their names, habitats, and interesting facts.
Interactive Learning Features
Consider adding interactive elements, such as flaps that open to reveal more information or quizzes related to the habitat.
14. Shadow Box Memory Diorama
Creating a shadow box memory diorama is a meaningful way to preserve cherished memories.
This unique form of diorama allows you to display your treasured keepsakes in a beautiful and captivating way.

Memorabilia Selection and Preservation
When creating a shadow box memory diorama, the first step is to select the memorabilia you want to feature.
This could include items like photographs, jewelry, tickets, or other small mementos. To preserve these items, consider using acid-free materials and a UV-filtering glass or acrylic to protect them from fading or damage.
- Choose items that hold sentimental value
- Use acid-free materials for backing and framing
- Consider a UV-filtering glass or acrylic
Layered Arrangement Techniques
A shadow box diorama is all about depth and layering. To create a visually appealing arrangement, consider using different levels and textures. You can achieve this by using risers, fabric, or other materials to create a sense of depth.
- Start with a background that complements your memorabilia
- Add a middle layer with fabric or other materials
- Finish with a foreground featuring your main memorabilia
Lighting for Emotional Impact
Lighting can greatly enhance the emotional impact of your shadow box diorama. Consider using LED lights or other soft lighting options to create a warm and inviting glow.
Spotlight Positioning
To draw attention to specific items, use spotlights or directional lighting. This will help create a sense of focus and highlight the importance of the memorabilia.
Shadow Management
To avoid harsh shadows, consider using diffused lighting or adjusting the position of your memorabilia. This will help create a soft, even glow that enhances the overall display.
By following these tips, you can create a stunning shadow box memory diorama that showcases your treasured keepsakes.
15. Interactive Mechanical Diorama
Creating an interactive diorama involves more than just aesthetics; it’s about crafting movement.
An interactive mechanical diorama is a dynamic way to showcase a scene or tell a story, engaging the viewer on multiple levels.

Simple Mechanism Design
The foundation of an interactive mechanical diorama is its mechanism. You can start with simple designs, such as levers or pulleys, to create movement. The key is to ensure that these mechanisms are smooth and reliable.
Movement Element Integration
Once you have your basic mechanism, you can integrate movement elements into your diorama.
This could be moving figures, rotating parts, or other dynamic components that enhance the interactive experience.
Durability and Functionality
For your diorama to be both interactive and long-lasting, you need to focus on durability and functionality.
This involves selecting materials that are not only aesthetically pleasing but also robust.
Gear and Lever Systems
Gear and lever systems are crucial for creating complex movements in your diorama. By carefully designing these systems, you can achieve a range of motions, from simple to intricate.
Access Points for Maintenance
To ensure that your interactive diorama remains functional over time, it’s essential to include access points for maintenance. This allows you to repair or adjust mechanisms as needed.
16. Holiday-Themed Diorama Ideas
Get into the holiday spirit with creative diorama ideas that capture the essence of your favorite celebrations.
Creating a holiday-themed diorama is a fun and imaginative way to celebrate the season.
Seasonal Celebration Scenes
Designing a diorama around a specific holiday or season allows you to explore different themes and settings.
You can recreate a winter wonderland for Christmas, a spooky scene for Halloween, or a festive setting for Thanksgiving.

Miniature Decoration Techniques
To make your holiday diorama truly special, focus on miniature decoration techniques. Use small ornaments, garlands, and other decorations to add detail and festivity to your scene.
Festive Lighting Integration
Lighting can dramatically enhance the ambiance of your holiday diorama. Consider using LED lights or small fairy lights to create a warm and inviting glow.
Snow and Winter Effects
For winter-themed dioramas, creating realistic snow and winter effects can be a fun challenge. Use white glue, water, and glitter to mimic snow, or create icicles with clear resin.
Tiny Ornament Creation
Crafting tiny ornaments and decorations adds a personal touch to your diorama. You can make these using clay, paper, or other materials, and they can be customized to fit your holiday theme.
By incorporating these elements, you can create a captivating holiday diorama that showcases your creativity and celebrates the spirit of the season.
Taking Your Diorama Projects to the Next Level
Now that you’ve explored various diorama ideas, it’s time to take your projects to the next level.
To create truly exceptional dioramas, you need to experiment with advanced diorama techniques. Start by pushing the boundaries of your creativity and trying new approaches.
One way to enhance your dioramas is by incorporating intricate details and textures.
Use a variety of materials to add depth and visual interest to your scenes. For instance, you can use modeling putty to create realistic terrain or fabric to simulate water effects.
To inspire your next creative diorama project, consider combining different themes or elements.
For example, you could merge a historical battle scene with a post-apocalyptic landscape. The key is to experiment and have fun with the process.
Some diorama tips to keep in mind: pay attention to scale, use reference images to ensure accuracy, and don’t be afraid to try new things.
By applying these principles and exploring advanced techniques, you’ll be well on your way to creating stunning dioramas that showcase your creativity.

