15 Creative Cornucopia Centerpiece Ideas for a Festive Table
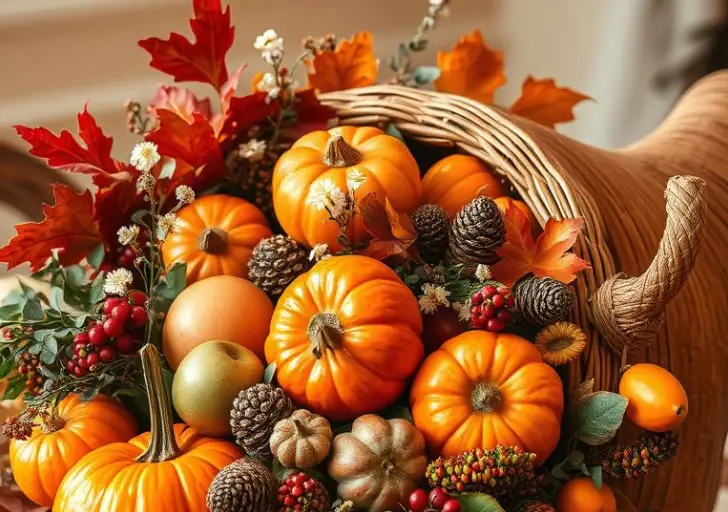
As the holiday season approaches, many of us are looking for ways to make our tables stand out. A beautifully crafted cornucopia centerpiece can be the perfect addition to your Thanksgiving or autumn celebration.

Creating a stunning DIY cornucopia is easier than you think, and it can add a warm, inviting touch to your holiday table decor. In this article, we’ll explore 15 creative ways to bring this classic symbol of abundance to your festive table.
The Timeless Tradition of Cornucopia Centerpieces
For generations, the cornucopia has been a cherished tradition in autumnal decor, symbolizing gratitude and abundance.
The cornucopia, often associated with harvest festivals and Thanksgiving celebrations, has its roots in ancient cultures.
The word “cornucopia” comes from the Latin words “cornu,” meaning horn, and “copia,” meaning plenty.

The tradition of using cornucopias as centerpieces dates back to the early European settlers in America, who used them to represent the abundance of the New World.
Over time, the cornucopia has evolved to become a staple in autumnal decorations, symbolizing the harvest season and the gratitude that comes with it.
You can create your own cornucopia centerpiece using a variety of materials, such as fresh flowers, fruits, and grains.
The key is to choose elements that reflect the abundance and richness of the season. By incorporating a cornucopia into your autumnal decor, you can add a touch of tradition and symbolism to your celebrations.
The cornucopia tradition is not limited to a specific culture or region; it is a universal symbol that transcends borders.
Whether you’re decorating for Thanksgiving or simply embracing the spirit of the harvest season, a cornucopia centerpiece is a beautiful way to express your gratitude and appreciation for the abundance in your life.
Essential Elements for Creating the Perfect Cornucopia Display
When it comes to designing a cornucopia, certain essential elements make all the difference.
A well-crafted cornucopia is more than just a decorative piece; it’s a centerpiece that can elevate the ambiance of your dining table or event space.
To create a stunning cornucopia, you need to focus on three key components: the base, the fillers, and the color scheme.
Selecting the Right Cornucopia Base
The base of your cornucopia serves as the foundation for your entire display. You can choose from a variety of materials, such as wicker, wood, or metal.
Consider the theme and style of your event when selecting the base.
- Wicker bases offer a traditional, rustic look.
- Wooden bases can add a warm, natural touch.
- Metal bases provide a modern, sleek appearance.
Choosing Seasonal Fillers
Seasonal fillers are the contents of your cornucopia, and they can vary greatly depending on the time of year and your desired theme. Popular fillers include fruits, vegetables, flowers, and foliage.

Color Coordination Tips
Color coordination is crucial to creating a visually appealing cornucopia. You can choose a monochromatic scheme for a cohesive look or mix and match different colors for a more vibrant display.
- Select a dominant color and use its variations.
- Complement your main color with neutral tones.
- Experiment with different textures to add depth.
Materials and Tools You’ll Need for DIY Cornucopia Centerpieces
To create a beautiful cornucopia centerpiece, you’ll need a few essential DIY materials and tools. Gathering these supplies will help you get started on your project.
You will need a cornucopia base or basket, which can be made of wicker, wood, or other materials.
You can choose a traditional horn-shaped cornucopia or a more modern design. Selecting the right base is crucial as it will determine the overall look of your centerpiece.
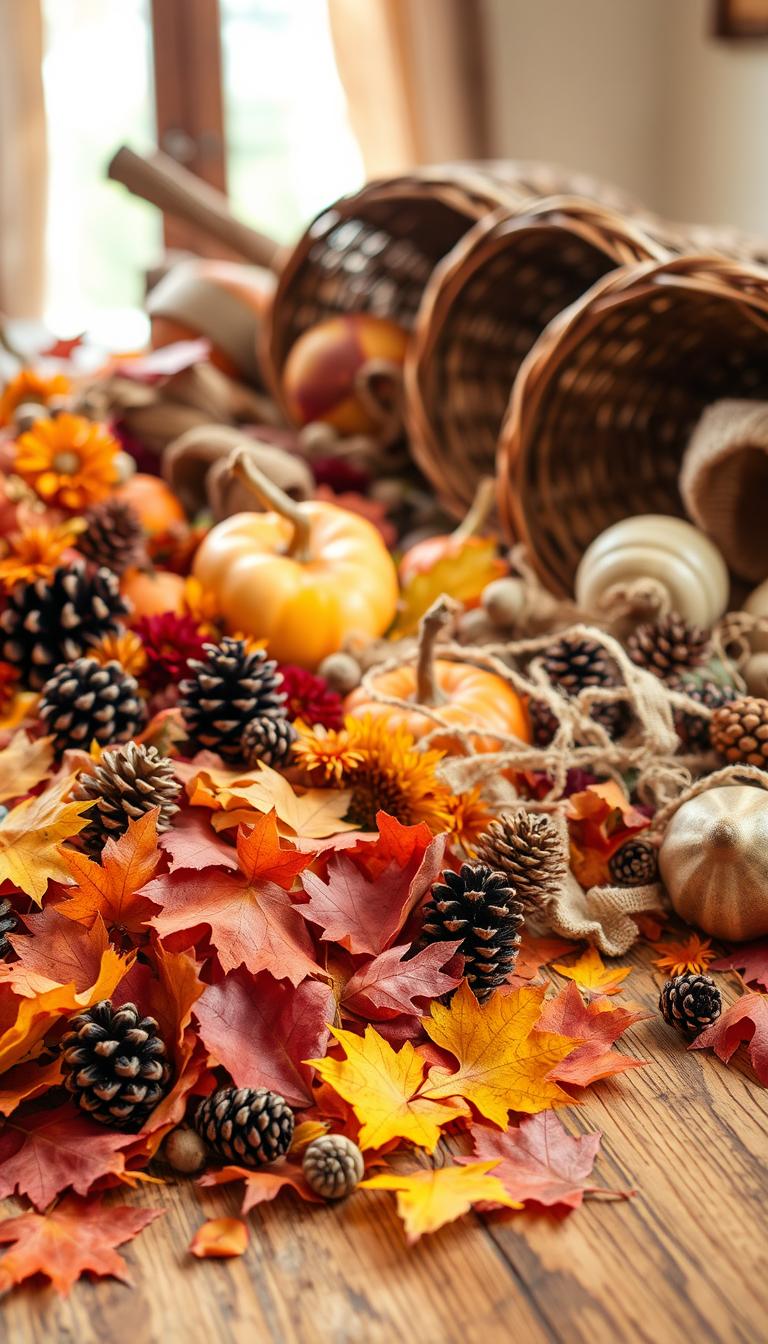
For filling your cornucopia, you’ll need seasonal items such as fruits, vegetables, flowers, or foliage.
You’ll also need some basic crafting tools like scissors, floral wire, and a hot glue gun to secure your fillings in place. Other useful centerpiece supplies include decorative ribbons, pinecones, and candles.
- Cornucopia base or basket
- Seasonal fillers (fruits, vegetables, flowers, etc.)
- Crafting tools (scissors, floral wire, hot glue gun)
- Decorative items (ribbons, pinecones, candles)
Having these DIY materials and cornucopia tools on hand will make it easier to create a stunning centerpiece that reflects your personal style.
15 Cornucopia Centerpiece Ideas That Will Impress Your Guests
From rustic harvests to elegant florals, explore our collection of 15 cornucopia centerpiece ideas to impress your guests this season.
These creative displays will transform your dining table into a festive and inviting atmosphere.
Here are some of the cornucopia centerpiece ideas you’ll discover:
- Rustic harvest cornucopias with natural elements
- Elegant floral arrangements
- Abundant fruit and vegetable displays
- Miniature cornucopias for individual place settings
- Candlelit cornucopias for evening gatherings
- And many more creative ideas!
These cornucopia ideas are designed to make a lasting impression on your guests.
With a variety of themes and elements to choose from, you’ll find the perfect centerpiece to match your style and occasion.

1. Rustic Harvest Cornucopia with Natural Elements
Create a warm and inviting atmosphere with a rustic harvest cornucopia. This centerpiece is perfect for the fall season, bringing together natural elements to create a beautiful display.
Materials Needed
- Wicker or wooden cornucopia base
- Seasonal fruits (apples, pears, gourds)
- Dried corn, wheat, or oats
- Pinecones
- Ribbon or twine for decoration
Step-by-Step Assembly
- Start by preparing your cornucopia base. If using a wicker base, ensure it’s clean and dry.
- Fill the base with dried corn or wheat to create a foundation.
- Arrange seasonal fruits and pinecones on top.
- Secure with ribbon or twine if needed.

Styling Tips
To enhance your rustic harvest cornucopia, consider adding candles or fairy lights around the centerpiece. Use a natural-colored tablecloth to complement the earthy tones of your display.
You can also add some fall-themed decorative items around the cornucopia to create a cohesive look.
2. Elegant Floral Cornucopia Arrangement
Creating an elegant floral cornucopia arrangement is a great way to add a touch of sophistication to your table setting. You can choose a variety of flowers to match your occasion and decor.
Flower Selection Guide
When selecting flowers for your cornucopia, consider using a mix of textures and colors to add depth and visual interest. Some popular choices include roses, carnations, and baby’s breath.
- Roses for a classic, romantic look
- Carnations for a bold, long-lasting bloom
- Baby’s breath for a soft, airy texture
Assembly Instructions
To assemble your floral cornucopia, start by preparing your flowers and greenery. Trim the stems at an angle and remove any leaves that will be below the waterline.
- Begin with a base of greenery, such as eucalyptus or ferns
- Add your chosen flowers, working your way around the cornucopia
- Finish with a sprinkle of baby’s breath or other filler flowers

Preservation Techniques
To extend the life of your floral cornucopia, keep it away from direct sunlight and heat sources. You can also use a floral preservative to help prevent bacterial growth.
By following these steps, you can create a beautiful and long-lasting elegant floral cornucopia arrangement to enjoy throughout your special occasion.
3. Fruit and Vegetable Abundance Cornucopia
Impress your guests with a colorful and abundant fruit and vegetable cornucopia this season.
A well-crafted cornucopia not only adds a decorative touch to your table but also celebrates the harvest season.
Selecting Seasonal Produce
Choose a variety of fruits and vegetables that are in season for the most vibrant colors and textures.
Consider using apples, pears, gourds, and squashes for a traditional autumn look. For a more exotic arrangement, incorporate persimmons, pomegranates, or citrus fruits.
Arrangement Techniques
Start by placing the largest items, such as gourds or squash, at the base of the cornucopia.
Then, fill in the gaps with smaller fruits and vegetables, working your way around the arrangement to achieve a balanced look.
You can also add some greenery, like eucalyptus or ferns, to add depth and texture.

Longevity Tips
To keep your cornucopia fresh, select fruits and vegetables that are not too ripe.
Check on your arrangement daily and remove any items that are beginning to spoil. You can also use a floral preservative to extend the life of your cornucopia.
4. Miniature Cornucopias for Individual Place Settings
Creating miniature cornucopias for individual place settings adds a personal touch to your table decor.
These small, charming arrangements can be customized to fit your theme and impress your guests.
Sizing and Materials
When creating miniature cornucopias, you’ll need smaller versions of the materials used for larger cornucopias.
Consider using small baskets, cones, or shells as bases. Fill them with seasonal items like tiny fruits, flowers, or nuts.
Personalization Ideas
To make each miniature cornucopia special, incorporate personal elements. You can add a small name tag, a tiny decorative item that matches your guest’s interests, or use their favorite colors in the arrangement.
Quick Assembly Guide
To assemble, start with your base, then fill it with your chosen materials. Secure the items with floral wire or a dab of glue. Finish with a decorative ribbon or bow.

5. Candlelit Cornucopia for Evening Gatherings
As the evening falls, a candlelit cornucopia can become the warm, inviting centerpiece your gathering needs. To create this ambiance, you’ll need to consider a few key elements.
Safety Considerations
When working with candles, safety should be your top priority. Ensure that your cornucopia is placed on a stable surface away from flammable materials. Never leave burning candles unattended.
Candle Selection
Choose candles that complement the colors and theme of your cornucopia.
Consider using pillar candles or tea lights to create a warm glow. The size and color of the candles should harmonize with your arrangement.
Creating Ambient Lighting
To enhance the ambiance, you can adjust the lighting around your cornucopia.
Dimming the main lights and using candles or string lights can create a cozy atmosphere. Experiment with different lighting setups to find the perfect balance.

6. Modern Metallic Cornucopia Centerpiece
Add a touch of modern elegance to your table setting with a sleek metallic cornucopia centerpiece.
This contemporary twist on a traditional decoration is sure to impress your guests and elevate your dining experience.

Material Options
When creating a modern metallic cornucopia, you have several material options to consider. You can use metallic paints or leafing to give your cornucopia a luxurious finish.
Alternatively, you can incorporate metallic elements such as copper, brass, or silver wire into your design.
- Copper wire for a warm, earthy tone
- Brass accents for a touch of sophistication
- Silver leafing for a sleek, modern look
Color Schemes
The color scheme you choose will greatly impact the overall aesthetic of your metallic cornucopia. Consider a monochromatic scheme featuring different shades of metallic tones, or mix and match complementary colors to create a bold statement.
Contemporary Styling
To achieve a contemporary look, focus on clean lines, minimal ornamentation, and a balanced composition.
You can also incorporate modern elements such as geometric shapes or abstract designs to give your cornucopia a unique twist.
7. Kid-Friendly Craft Cornucopia Project
Making a cornucopia with kids can be a wonderful way to teach them about abundance and gratitude. This fun and creative project is perfect for a family activity or classroom setting.
Age-Appropriate Materials
When creating a kid-friendly craft cornucopia, it’s essential to choose materials that are safe and suitable for their age group. Some recommended materials include:
- Colorful construction paper
- Glue sticks
- Scissors (blunt-tipped for younger children)
- Faux fruits and vegetables
- Ribbon or yarn for decoration
Simple Assembly Steps
Assembling the cornucopia is a straightforward process that kids can follow with minimal supervision. Here’s a simple guide:
- Start with a base, such as a paper plate or a Styrofoam cone.
- Cut out shapes from construction paper to create the cornucopia’s body.
- Glue the shapes onto the base, overlapping them to create a full and abundant look.
- Add faux fruits and vegetables to fill the cornucopia.
- Decorate with ribbon or yarn.
Educational Opportunities
This craft project offers several educational opportunities, including:
- Teaching children about the concept of abundance and gratitude.
- Developing fine motor skills through cutting and gluing.
- Encouraging creativity and self-expression.

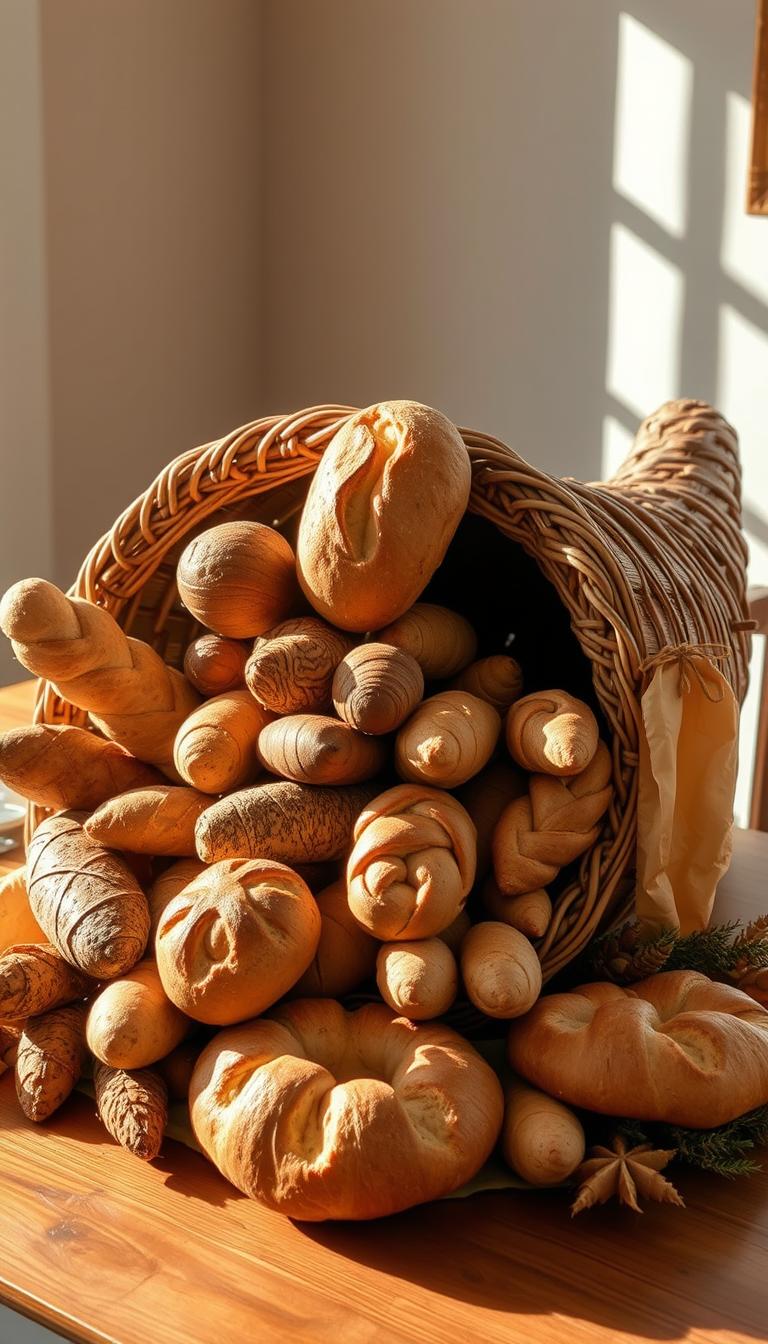
8. Edible Bread Cornucopia Centerpiece
You can make a beautiful and delicious edible bread cornucopia to adorn your table. This unique centerpiece is perfect for special occasions and holidays, adding a personal touch to your dining experience.
Bread Dough Recipe
To start, you’ll need to make a bread dough. Here’s a simple recipe:
- 2 cups of warm water
- 2 teaspoons of active dry yeast
- 3 tablespoons of sugar
- 4 cups of all-purpose flour
- 1 teaspoon of salt
Baking Instructions
Once you’ve prepared the dough, shape it into a cornucopia form and bake until golden brown. Here’s how:
- Preheat your oven to 375°F (190°C).
- Shape the dough into a cornucopia shape and place on a baking sheet.
- Bake for 25-30 minutes, or until golden brown.
Filling with Edible Treats
After the bread cornucopia has cooled, you can fill it with a variety of edible treats, such as:
- Fresh fruits, like apples or grapes
- Nuts, like almonds or walnuts
- Chocolates or candies
9. Eco-Friendly Sustainable Cornucopia Design
You can make a beautiful and sustainable cornucopia using natural and biodegradable materials. This approach not only reduces waste but also adds a unique touch to your decor.
Biodegradable Materials
When creating your eco-friendly cornucopia, consider using materials that are biodegradable. Some options include:
- Dried leaves
- Pinecones
- Twigs
- Recycled paper
- Natural fibers
Repurposing Ideas
Repurposing materials is a great way to make your cornucopia more sustainable. You can use:
- Old baskets or containers
- Natural elements like pinecones and branches
- Recycled materials like cardboard or newspaper
Environmental Benefits
By choosing eco-friendly materials and repurposing items, you’re reducing waste and minimizing your environmental impact. This approach also encourages creativity and sustainability in your decorating choices.

10. Themed Cornucopias for Special Occasions
When it comes to special occasions, a themed cornucopia can elevate your table setting to a whole new level.
You can tailor your cornucopia to fit the theme of your celebration, making it a unique and memorable centerpiece.
Holiday-Specific Adaptations
For holidays like Thanksgiving, you can fill your cornucopia with seasonal fruits, vegetables, and grains.
For Christmas, consider using evergreen branches, holly, and red berries to create a festive atmosphere.
Color Theme Variations
Choose a color scheme that matches your occasion. For example, use pastel colors for Easter or bright colors for a birthday party.
You can also incorporate metallic accents like gold or silver for a more luxurious look.
Occasion-Based Fillers
Select fillers that are relevant to your celebration. For a harvest-themed party, use dried corn, wheat, and other natural elements. For a more elegant affair, consider using flowers, candles, or ornaments.

- Using seasonal flowers and greenery
- Incorporating themed decorations, like candy for a birthday or eggs for Easter
- Creating a monochromatic color scheme
By tailoring your cornucopia to your special occasion, you can create a beautiful and meaningful centerpiece that enhances your celebration.
11. Succulent and Air Plant Cornucopia
Create a stunning succulent and air plant cornucopia to add a touch of modern elegance to your table setting.
This unique centerpiece combines the beauty of succulents and air plants with the symbolism of abundance, making it perfect for any occasion.
Plant Selection
When choosing plants for your succulent and air plant cornucopia, consider the size, texture, and color of the plants.
Select a variety of succulents in different shapes and sizes, and add some air plants for a touch of whimsy. Some popular succulent options include Echeveria, Sedum, and Crassula.
Long-Term Care
To keep your succulent and air plant cornucopia thriving, make sure to provide the right conditions.
Succulents need well-draining soil and infrequent watering, while air plants require misting and occasional soaking. With proper care, your cornucopia will remain healthy and beautiful for a long time.
Modern Design Elements
To give your succulent and air plant cornucopia a modern twist, incorporate contemporary design elements such as geometric shapes, metallic accents, or glass containers.
You can also add some decorative rocks, moss, or other natural elements to enhance the visual appeal.

12. Woodland-Inspired Cornucopia with Pine Cones and Berries
Bring the forest to your table with a woodland-inspired cornucopia featuring pine cones and berries.
This natural and rustic centerpiece is perfect for the fall season, adding warmth and coziness to your dining area.

Foraging Tips
When foraging for materials, look for pine cones in various sizes and shapes. Choose berries that are in season, such as cranberries or holly berries, for a pop of color.
Make sure to collect materials sustainably and avoid damaging the environment.
Natural Material Preparation
Clean and dry the pine cones and berries before using them. You can also add other natural elements like twigs, acorns, or dried leaves to enhance the arrangement.
Rustic Arrangement Techniques
Start by placing the largest pine cones at the base of the cornucopia, then fill in the gaps with smaller cones and berries.
Use floral wire or hot glue to secure the elements in place. Finish with a ribbon or twine around the base for a rustic touch.
13. Dried Flower and Herb Cornucopia
You can craft a stunning dried flower and herb cornucopia to add a touch of elegance to your home decor.
This beautiful arrangement not only brings the outdoors in but also provides a long-lasting display that can be enjoyed throughout the season.
Drying Methods
To create your dried flower and herb cornucopia, you’ll first need to dry the flowers and herbs. There are several methods to do this:
- Air drying: Simply tie the flowers and herbs in small bunches and hang them upside down in a warm, dry place.
- Oven drying: Place the flowers and herbs on a baking sheet and dry them in a low-temperature oven (150°F – 200°F) for a few hours.
- Desiccant: Use a desiccant like silica gel or borax to absorb moisture from the flowers and herbs.
Aromatic Combinations
One of the joys of creating a dried flower and herb cornucopia is experimenting with different aromatic combinations.
Consider pairing flowers like lavender or roses with herbs like eucalyptus or rosemary for a unique scent.

Preservation for Future Use
To preserve your dried flower and herb cornucopia for future use, store it in a cool, dry place away from direct sunlight.
You can also use a clear sealant to protect the arrangement from dust and moisture.
By following these steps, you can create a beautiful and long-lasting dried flower and herb cornucopia to enjoy throughout the season.
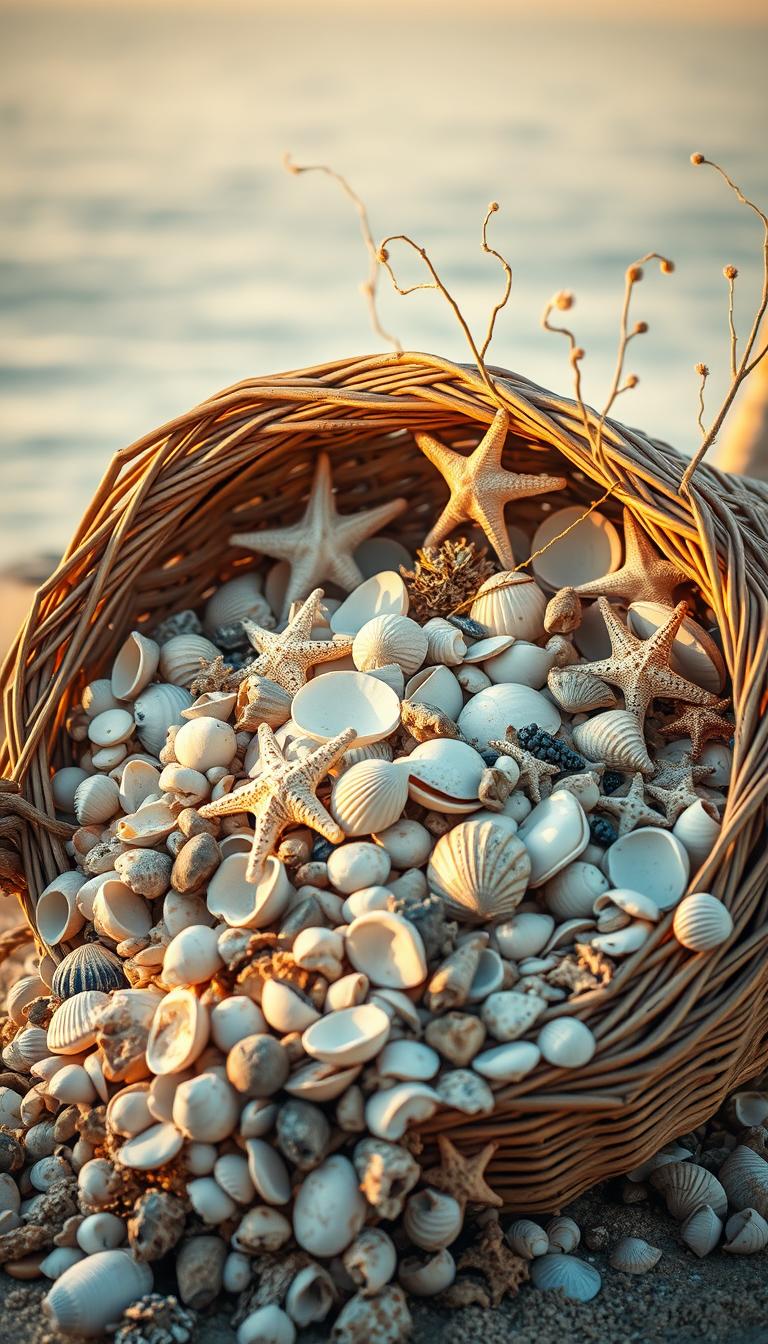
14. Coastal-Themed Cornucopia with Shells and Blue Hues
Bring the beach to your dining table with a coastal-themed cornucopia that captures the essence of the ocean.
This unique centerpiece is perfect for a summer gathering or a nautical-themed party.
Beach Element Selection
To create a coastal-themed cornucopia, you’ll need to select the right beach elements. Consider using:
- Seashells in various shapes and sizes
- Driftwood or weathered wood pieces
- Starfish or sand dollars
- Blue glass or pebbles
Color Palette Guidance
A coastal-themed cornucopia typically features a calming color palette that reflects the ocean’s hues.
Stick to shades of blue, from soft sky tones to deep navy, and complement with neutral tones like beige or sandy whites.
Nautical Styling Tips
To give your cornucopia a nautical touch, consider adding some rope details or a small anchor. You can also incorporate netting or a small sailboat to enhance the coastal theme.
15. Luxury Cornucopia with Velvet and Gold Accents
Make a statement with a luxury cornucopia that combines opulent velvet and metallic gold elements.
This elegant centerpiece is perfect for special occasions and will add a touch of sophistication to your table setting.
Premium Material Selection
To create a luxurious cornucopia, you’ll need to select premium materials that exude opulence. Consider using:
- Velvet fabric in rich jewel tones
- Gold-painted pinecones or other decorative elements
- Luxurious flowers or foliage
- High-quality decorative cornucopia base
Elegant Assembly Techniques
To assemble your luxury cornucopia, follow these steps:
- Wrap the velvet fabric around the cornucopia base, securing it with floral wire or a hot glue gun.
- Arrange the luxurious flowers or foliage within the cornucopia, working from the center outwards.
- Add gold-painted pinecones or other decorative elements to fill out the arrangement.
Special Occasion Presentation
To make your luxury cornucopia a showstopper, consider the following presentation ideas:
- Place the cornucopia on a decorative charger or table runner to add extra visual interest.
- Surround the cornucopia with candles or fairy lights to create a warm ambiance.
- Use the cornucopia as a focal point for your table setting, balancing it with other decorative elements.

Styling and Placement Tips for Your Cornucopia Centerpiece
When it comes to creating a stunning table setting, the styling and placement of your cornucopia centerpiece play a crucial role.
A well-styled and appropriately placed centerpiece can elevate the ambiance of your dining area and create a lasting impression on your guests.
Table Size Considerations
The size of your table is a critical factor in determining the ideal size and placement of your cornucopia centerpiece.
For smaller tables, a more compact centerpiece is recommended to avoid overwhelming the space. In contrast, larger tables can accommodate bigger, more elaborate centerpieces.
Height and Visibility Factors
The height of your cornucopia centerpiece is another important consideration. You want to ensure that it doesn’t obstruct conversation or visibility across the table.
A general rule of thumb is to keep the centerpiece low enough to allow for easy conversation, but tall enough to be visually appealing.
Complementary Table Settings
To create a cohesive look, consider the style and color scheme of your table settings when styling your cornucopia centerpiece.
Choose a centerpiece that complements your dinnerware, glassware, and linens.
For example, a rustic cornucopia might pair well with earth-toned ceramics and natural fiber linens.
By considering these styling and placement tips, you can create a beautiful and inviting table setting that showcases your cornucopia centerpiece to its fullest potential.
Preserving Your Cornucopia Display Throughout the Season
Preserving your cornucopia display requires some care and attention to detail, but with the right techniques, it can remain a stunning focal point all season long.
To achieve this, you’ll need to focus on a few key areas: caring for the natural elements, storing the display between events, and refreshing it as needed.
Natural Element Preservation
To keep your cornucopia looking fresh, it’s crucial to preserve its natural elements. Here are some tips:
- Keep flowers away from direct sunlight and heat sources.
- Mist fresh flowers daily to maintain their moisture.
- Use floral preservatives to extend the life of cut flowers.
Storage Between Events
When you’re not using your cornucopia, proper storage is essential. Consider the following:
- Store the cornucopia in a cool, dry place.
- Wrap delicate components in tissue paper or cloth to prevent damage.
- Keep the storage area away from pests and moisture.
Refreshing Techniques
To refresh your cornucopia, you can:
- Replace wilted flowers with fresh ones.
- Dust the arrangement gently to remove any debris.
- Re-fluff any dried elements, like flowers or foliage.
By following these simple steps, you can enjoy your cornucopia centerpiece for a longer period, making it a beautiful and lasting part of your seasonal decor.
Bringing Your Festive Table Together with the Perfect Cornucopia
As you’ve explored the various cornucopia centerpiece ideas, you’re now equipped to create a truly festive table that will impress your guests.
The perfect cornucopia is more than just a decorative piece; it’s a symbol of abundance and warmth, setting the tone for a memorable gathering.
By choosing the right cornucopia base, selecting seasonal fillers, and coordinating colors, you can craft a centerpiece that complements your table setting.
Whether you opt for a rustic harvest theme, an elegant floral arrangement, or a modern metallic design, your cornucopia will be the crowning glory of your festive table.
As you bring your chosen cornucopia to life, remember to have fun and be creative. Experiment with different materials, textures, and colors to create a unique centerpiece finale that reflects your personal style.
With these ideas, you’ll be well on your way to creating a festive table that’s both beautiful and meaningful.

